How to Cut Soles of Shoes: Easy Steps for a Perfect Fit
Have you ever found yourself stuck with shoes that don’t fit right because the soles are too long or bulky? It’s frustrating when your favorite pair feels uncomfortable or awkward to walk in.
What if you could fix this yourself, quickly and safely, without buying new shoes or paying for expensive repairs? Learning how to cut the soles of your shoes can save you time, money, and hassle. In this guide, you’ll discover simple steps to reshape your shoe soles perfectly, so your shoes feel just right every time you wear them.
Keep reading to unlock easy tips that will change the way you handle shoe fit forever.

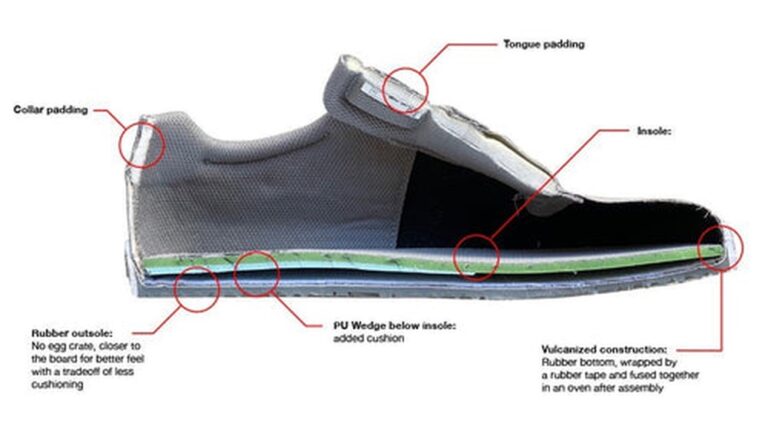
Credit: theshopyohjiyamamoto.com
Tools Needed
Cutting the soles of shoes needs the right tools. Proper tools make the job easier and safer. You need sharp, sturdy tools to cut through thick materials. Safety gear helps protect your hands and fingers. Precision tools help you make clean, even cuts. Preparing the right tools first saves time and effort.
Choosing The Right Knife Or Cutter
A sharp utility knife works well for most shoe soles. Look for a knife with a strong, replaceable blade. A craft knife can also work for detailed cuts. Make sure the blade is new or very sharp. Dull blades cause uneven cuts and require more force. Use a knife with a comfortable handle for better control. Avoid scissors as they often can’t cut thick soles cleanly.
Additional Materials For Safety And Precision
Wear cut-resistant gloves to protect your hands. A cutting mat helps protect your work surface. Use clamps or heavy objects to hold the shoe steady. A ruler or straight edge guides your cut lines. Mark the cut line with a pencil or chalk first. Good lighting helps you see the cutting lines clearly. Keep all tools within reach to avoid accidents.

Credit: www.youtube.com
Preparing The Shoes
Preparing the shoes is the first step before cutting the soles. Proper preparation helps you make clean, accurate cuts. It also protects the shoe and your tools.
Start by getting the soles ready. This makes the cutting process easier and safer. Two main tasks are cleaning the soles and marking cutting lines.
Cleaning The Soles
Remove all dirt and debris from the soles. Use a brush or a damp cloth. Clean soles let you see the exact shape clearly. This helps avoid mistakes while cutting. Let the soles dry completely before moving on.
Marking The Cutting Lines
Use a pencil or chalk to draw cutting lines. Follow the shape you want to achieve. Mark both soles to keep them even. Clear lines guide your cuts and reduce errors. Check the lines twice before you start cutting.
Cutting Techniques
Cutting the soles of shoes requires careful techniques. This process shapes the sole for better fit or style. Using the right methods avoids damage and keeps the shoe strong. Follow clear steps and tips for the best results.
Step-by-step Cutting Process
Start by removing the shoe’s laces and inserting a shoe last or form. Mark the cutting line with a pencil or chalk. Use a sharp utility knife or strong scissors for cutting. Cut slowly along the marked line to maintain control. Keep the knife angle steady to avoid jagged edges. Trim small amounts at a time for accuracy. Check the fit often during cutting to prevent over-cutting. Finish by smoothing the edges with sandpaper or a file.
Tips For Smooth And Even Cuts
Work on a stable surface to keep the shoe steady. Use a ruler or straight edge to guide your cuts. Change blades often to keep them sharp. Cut in good light to see the lines clearly. Wear protective gloves to avoid injury. Hold the shoe firmly but do not squeeze it. Practice on old shoes to build confidence. Take breaks to avoid hand fatigue and mistakes.
Shaping And Finishing
Shaping and finishing are key steps in cutting shoe soles. They help make the sole fit perfectly and feel comfortable. Proper shaping also gives the sole a clean, neat look. This part of the process takes patience and care. Small details make a big difference in the shoe’s final quality.
Trimming Excess Material
Start by cutting off extra material around the sole’s edge. Use sharp scissors or a knife for clean cuts. Trim slowly to avoid cutting too much. The goal is to follow the shoe’s shape closely. Removing excess material helps the sole lay flat and fit well. Check both sides of the sole to keep it even.
Sanding And Smoothing Edges
After trimming, edges may feel rough or uneven. Use fine sandpaper to smooth these edges gently. Sand in one direction for a neat finish. This step prevents discomfort and improves the sole’s look. Smooth edges also help the sole stick better if glued. Take your time to get a clean, soft edge all around.
Fitting And Adjustments
Fitting and adjustments are key after cutting shoe soles. These steps ensure comfort and proper function. The goal is a perfect fit that feels natural. Small changes can make a big difference. Take time to check every detail before finalizing.
Checking The Fit
Try the shoes on after cutting the soles. Walk around to feel how they fit. Notice if any area feels tight or loose. Pay close attention to the heel and toes. Shoes should not pinch or slip off. Check both shoes as they may feel different. Use a mirror to see the sole edges. Make sure the cut is even and smooth. Mark any spots that need trimming or padding.
Making Final Modifications
Use sandpaper or a file to smooth rough edges. Trim small excess parts for better comfort. Add thin padding if areas feel hard or sharp. Glue loose parts firmly back in place. Test the shoes again after each change. Adjust gradually to avoid over-cutting. Keep the sole thickness balanced on both shoes. Final tweaks improve walking and shoe life. Take your time to get it right.

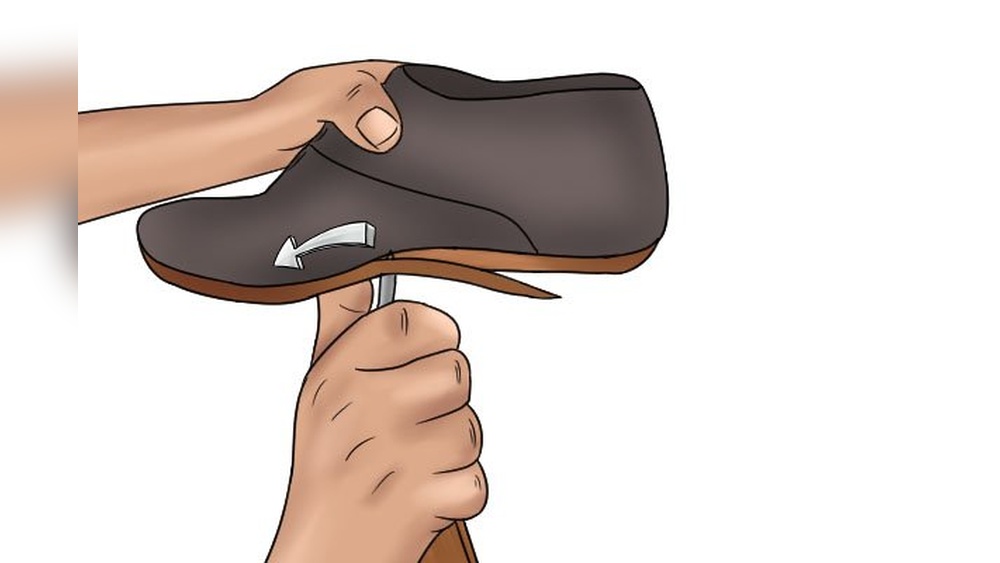
Credit: theshopyohjiyamamoto.com
Maintenance After Cutting
After cutting the soles of your shoes, proper care is key. Maintenance helps keep the new edges strong and the shoes comfortable. Without good care, the cut areas might wear out fast or get damaged. Follow simple steps to protect your shoes and extend their life.
Protecting The Cut Soles
Apply a thin layer of clear shoe glue to the cut edges. This prevents cracking and separates the layers. Let the glue dry fully before wearing the shoes again. Avoid walking on rough surfaces right after the cut. Use shoe polish or conditioner to keep the soles flexible. Store shoes in a cool, dry place to avoid moisture damage.
When To Seek Professional Help
Check your shoes regularly for any signs of damage or loosening. If the soles start to peel or crack deeply, visit a cobbler. Professionals can reinforce or replace soles properly. Do not try to fix deep cuts or tears yourself. A cobbler has the tools and skills for safe repairs. Regular visits can save your shoes from major damage.
Frequently Asked Questions
How Do I Safely Cut The Soles Of My Shoes?
Use a sharp utility knife or strong scissors. Mark the cutting line clearly. Cut slowly and steadily to avoid mistakes. Always work on a stable surface. Wear protective gloves to prevent injuries.
What Tools Are Best For Cutting Shoe Soles?
A sharp utility knife, heavy-duty scissors, or a rotary tool works best. These tools provide precision and control. Ensure blades are sharp for clean cuts. Avoid dull tools to prevent uneven edges or damage.
Can Cutting Shoe Soles Affect Shoe Durability?
Yes, improper cutting can weaken the sole’s structure. Cutting too deep may cause sole separation. Always trim carefully and avoid removing too much material. Proper cutting maintains shoe durability and comfort.
How To Measure Before Cutting Shoe Soles?
Measure the area you want to trim with a ruler or tape. Mark the cutting line with a pencil or chalk. Double-check measurements to ensure accuracy. Correct measurements prevent mistakes and save shoe integrity.
Conclusion
Cutting shoe soles can save money and extend shoe life. Always measure carefully before cutting. Use sharp tools for clean, precise cuts. Take your time to avoid mistakes. Practice on old soles to build confidence. With patience, you can customize your shoes easily.
This simple skill helps keep shoes comfortable and durable. Try these steps and see the difference.